chicago.jedi
Knight Commander

Force Alignment: 287
Posts: 1020
Light side points please
|
 |
« on: May 14, 2013, 04:25:34 PM » |
|
OK, so I decided to try my hand at building a saber. I sought help on the forum and got lots of good advice. I finally got around to doing some of the work, so here it is. It is not finished but I figured I would take you on the journey. My first step was shopping. I had some extra parts lying around so I bought a body and the guts to make a complete saber. This thing is a mixed bag of odd stuff so I came up with a back story. This saber belonged to a former Jedi who escaped the purge. His saber was originally much nicer and more specialized but over the years of hiding, he had to make repairs with whatever he could find. Next, I tried my hand at olive oil weathering. It was a real experience (set off my smoke detectors), but it worked as described. It came out kind of blotchy but I like it. It does not look ancient, just used and abused, like it was left out in the rain. Next I decided to put a d-ring on the pommel. This required drilling and tapping which I have never done. I bought a small drill press from a jeweler supply dealer. It is a Euro Tool 300 benchtop drill press and it is great for what I wanted it for. You can not do any major machining with this thing, but drilling holes for saber smithing, it is great. If you are space limited like I am , this is the drill press for you. I drilled my holes wearing saftey glasses of course and used 3-in-1 oil for lube. I then tapped the holes for 8-32 screws and attached the d-ring I made out of brass. Next is the electronics but I need to take a break for now. I have never soldered wire before but getting this far has given me confidence in trying new things. Enjoy the pics. I will post more as I go.  The parts 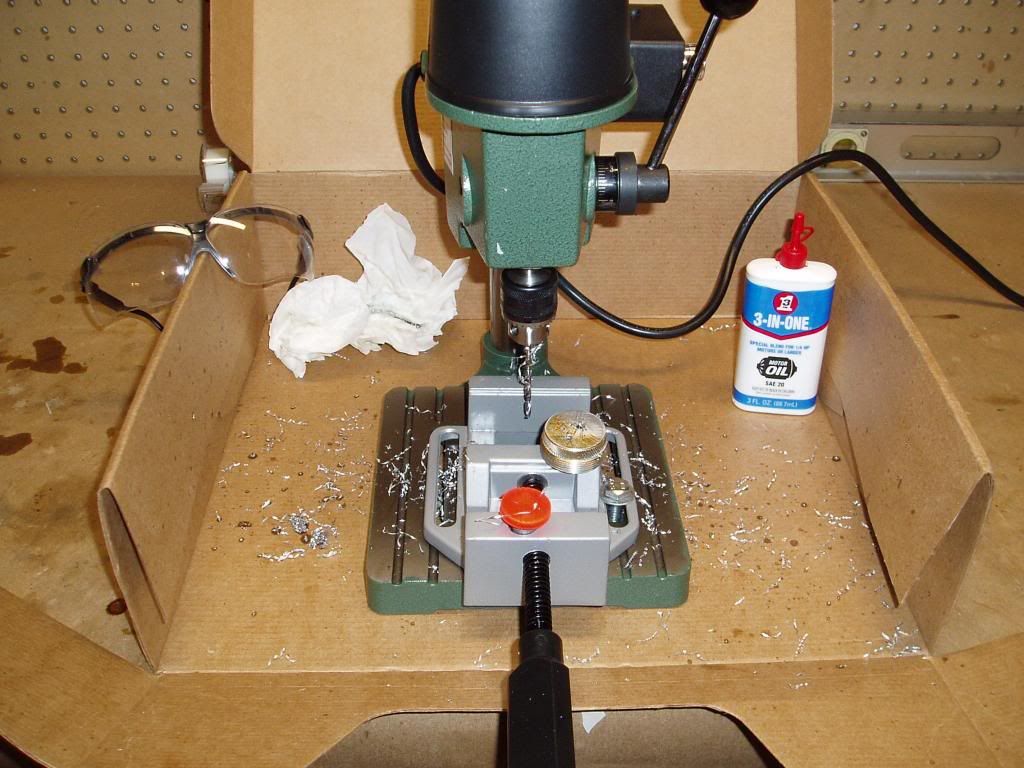 The new tool 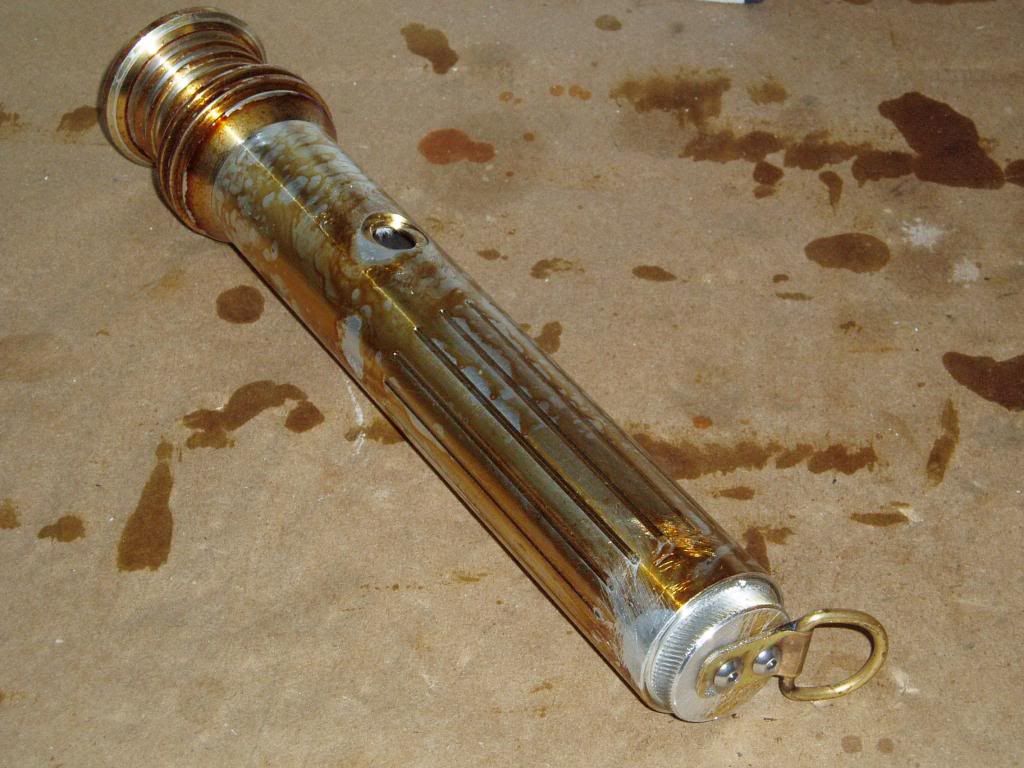 The hilt with weathering and d-ring  The pommel with d-ring drilled and tapped. |
|
|
|
|
 Logged
|
|
|
|
|
borgishmorg
Knight Sergeant

Force Alignment: -27
Posts: 96
Conjurer of Dark Magik
|
|
« Reply #1 on: May 14, 2013, 06:35:57 PM » |
|
Whoa, that is some really unique weather, it looks really cool!
Will be following this post, can't wait to see the finished saber.
|
|
|
|
|
Logged
|
 Aeon LE V3 in CG Standard Issue V3 in BR Shock with v3 Sound in GB Dark Menace with v4 Sound in PO Consular with v4 Sound in Tri-CG |
|
|
|
chicago.jedi
Knight Commander
Force Alignment: 287
Posts: 1020
Light side points please
|
|
« Reply #2 on: May 14, 2013, 07:21:16 PM » |
|
Whoa, that is some really unique weather, it looks really cool!
Will be following this post, can't wait to see the finished saber.
Thanks. Believe me when I say the unique weathering came out by accident. This project is all about trying all of the neat stuff I only read about on this forum. I would never try this stuff on a fancy saber I just spent big bucks on. That is why it is made of odds and ends. I have learned a lot so far and I hope others might learn something through me, I keep no secrets. I see why lightsaber building is one of the last tests of a Jedi!! Keep watching. Next step...soldering!!!!! |
|
|
|
|
Logged
|
|
|
|
|
jmPlagueis
Knight Commander
Force Alignment: 153
Posts: 1224
Saber Tinkerer
|
|
« Reply #3 on: May 16, 2013, 03:31:57 AM » |
|
Yes the weathering is actually pretty stellar, Im liking it a lot so far!
|
|
|
|
|
Logged
|
|
|
|
|
|
|
|
« Reply #4 on: May 17, 2013, 10:29:38 PM » |
|
Nice. Can't wait to see this completed. Looks good so far. The weathering does reminded me of a somewhat rusted look like a Jedi found this saber out in the rain for a long time.
|
|
|
|
|
Logged
|
Sabers: Liberator V3 CG ObsV4 sound!, Graflex GB, Overlord AB, Crimson Savior BR, Bane PO, Dark Initiate V2 LE BH, Shock GB, Archon V2.1 CG, Dark Sentinel LE GB ObSLite!, Standard Issue V3 CG, Dominix V3 LE BR, Sentinel SRD, Dominix V2 FO Next sabers: Dark Prophecy BVA, Negotiator AS, Enigma EG, Brylark CE SY  [/url] SW1 by joshgarcia07[/url |
|
|
|
chicago.jedi
Knight Commander
Force Alignment: 287
Posts: 1020
Light side points please
|
|
« Reply #5 on: May 19, 2013, 01:17:13 AM » |
|
OK, I am finished. 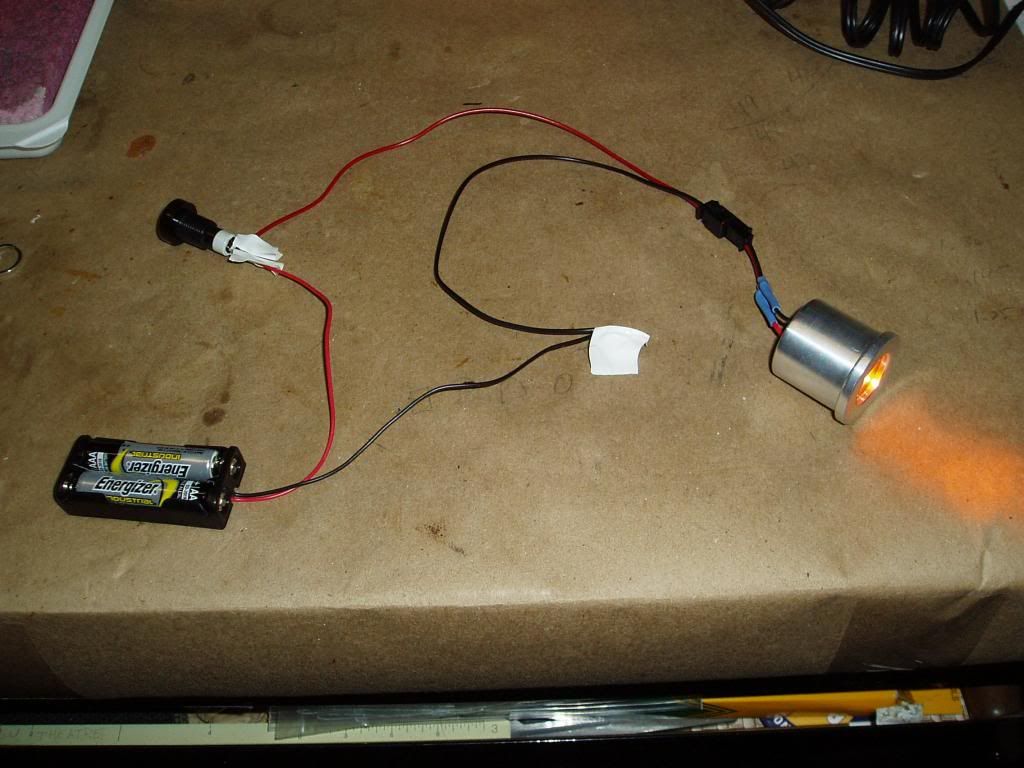 Testing the circuit.  Testing my fit up.  Practice makes perfect.  Stage one complete.  One more test. 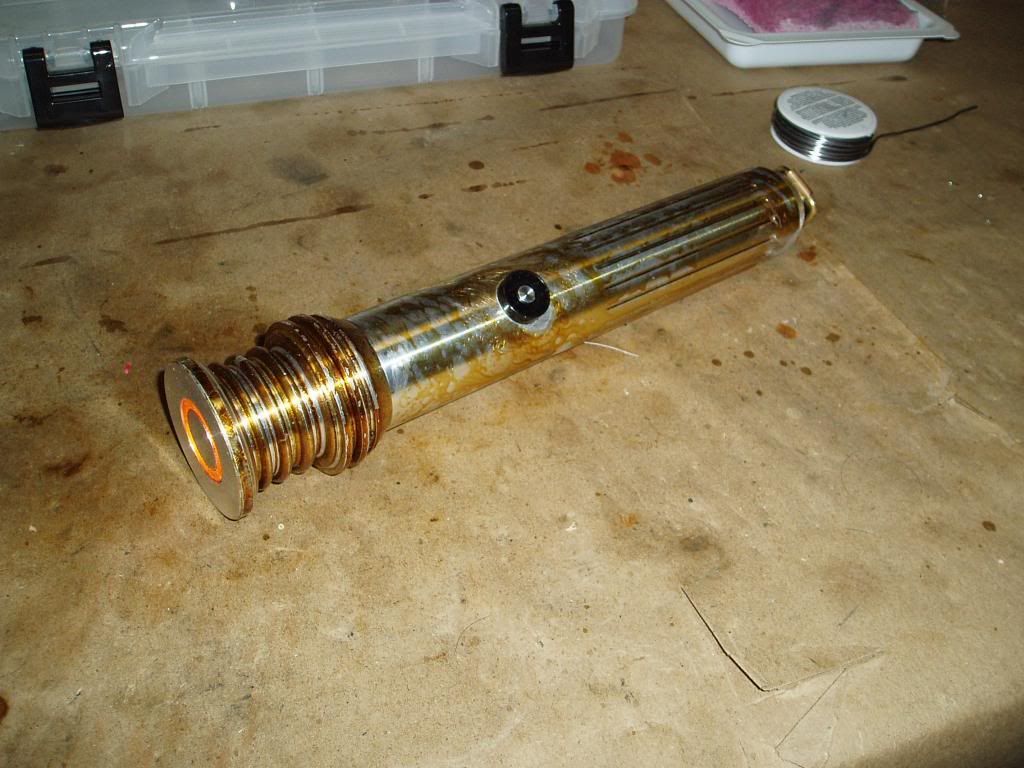 Assembled.  A little leather to add some character. 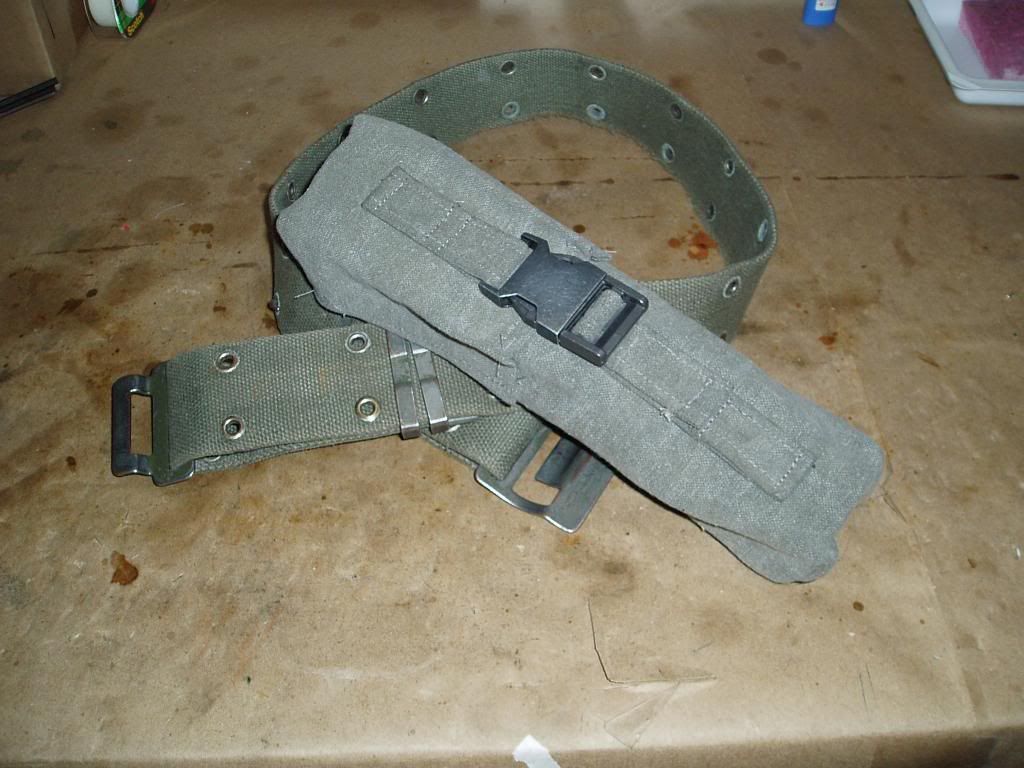 Home made concealed carry saber case. Yes, I made this myself from a chunk of old tarp.  All done!!!! I hope you enjoyed this journey with me. I learned a lot and hope someone else might learn something from this, too. |
|
|
|
|
Logged
|
|
|
|
|
eerockk
Knight of the Obsidian Order
Knight Commander
Force Alignment: 662
Posts: 3540
TPLA Lx Apprentice - Nova 7
|
|
« Reply #6 on: May 23, 2013, 09:51:43 PM » |
|
OK, too many people are bringing their A-games to this forum! That is amazing weathering! The "rust" is very convincing!
|
|
|
|
|
Logged
|
Bellicose - Prophecy V3 - Overlord - Archon 2.1 - Guardian
|
|
|
|
chicago.jedi
Knight Commander
Force Alignment: 287
Posts: 1020
Light side points please
|
|
« Reply #7 on: May 24, 2013, 02:56:16 PM » |
|
OK, too many people are bringing their A-games to this forum! That is amazing weathering! The "rust" is very convincing!
Thanks a lot. I can not take all of the credit, I just followed ideas and direction I found on the forum. It is all here somewhere. Once I got over the pucker factor and just went for it, the rest fell in place. This forum really is a wealth of information. This project was all about trying new things, and it was worth it. Thanks to all of the kind words about my project. And thanks to all who came before and gave me the ideas and information to accomplish it. |
|
|
|
|
Logged
|
|
|
|
|
Kreyopresny
Knight Aspirant

Force Alignment: 0
Posts: 14
|
|
« Reply #8 on: May 28, 2013, 05:02:39 PM » |
|
Amazing work, unique and beautiful. Points 4u!
|
|
|
|
|
Logged
|
|
|
|
|
Jay Nightshade
Knight Ensign

Force Alignment: 13
Posts: 195
Light side points please
|
 |
« Reply #9 on: May 29, 2013, 08:01:53 AM » |
|
Dude that is some really nice saber assembly skills you have there.
Totally worth a point for sheer awesomeness
|
|
|
|
|
Logged
|
 Lorem-Dark Liberator V3- Fire Orange Old Republic RP Zael Dawnbolt- Human Guild Explorer/Medic New TOR RP Alecs Varin- Human Jedi Guardian |
|
|
|
Sky Dragon c5
Knight Commander
Force Alignment: -1
Posts: 2252
Grey Jedi Assassin
|
|
« Reply #10 on: May 29, 2013, 11:31:01 PM » |
|
That some amazing custom work, love seeing a ring clip.
Also good mix of parts from different sabers!
|
|
|
|
|
Logged
|
 Keep me as a Grey Jedi Please C=Custom, D=Dark Rd Reaper AS, Archon V2.1 AB, Consular CG, Malice BR, Overlord PO, Shock LE SY, D Shock DVA, D Liberator AS, Raven FO, D War EG, C Manticore BH, C D Shock RGB, C D Arbiter SR, C Archon V2. |
|
|
|
|
|
|
« Reply #11 on: May 31, 2013, 01:10:12 AM » |
|
VERY NICE. I like your blade color choice. It goes nicely with the weathering. Light side point for you!
|
|
|
|
|
Logged
|
Aeon v2 LE Guardian Blue
Give me light side points so we can make better cookies than the Empire!
|
|
|
|
chicago.jedi
Knight Commander
Force Alignment: 287
Posts: 1020
Light side points please
|
|
« Reply #12 on: May 31, 2013, 09:31:01 PM » |
|
VERY NICE. I like your blade color choice. It goes nicely with the weathering. Light side point for you!
Thanks. I chose orange because it was easy to wire...no resistors to worry about. But I think it does look nice with the finished product. It is not a "common" saber color so I think it goes well with the "old and abused" saber look. Thanks for checking out my work. Hope my pictures and info are useful. |
|
|
|
|
Logged
|
|
|
|
|
Cardel
Force Sensitive

Force Alignment: 7
Posts: 9
|
|
« Reply #13 on: June 01, 2013, 11:51:05 PM » |
|
Thanks. I chose orange because it was easy to wire...no resistors to worry about. But I think it does look nice with the finished product. It is not a "common" saber color so I think it goes well with the "old and abused" saber look.
Thanks for checking out my work. Hope my pictures and info are useful.
Wow, I must say, this is really impressive work! I was considering making my own saber as well, although I have next to no experience in engineering things together. How difficult were the electronics to master? I was wanting to make one myself, using perhaps a different colour - Is there a guide around somewhere as to which colours require which types of electronics and internals? Also, how difficult is it to put all the internals together okay? For example, does the battery case "rattle around" inside the saber hilt? Final question, if that's alright - what equipment did you need to construct this all? Was it only the drill press and the soldering iron, or does self-assembly require more specialised tools? Apologies for the barrage of questions - your work here is absolutely excellent, and I figured the best place to learn would be from people who've had exceptional outcomes! |
|
|
|
|
Logged
|
|
|
|
|
chicago.jedi
Knight Commander
Force Alignment: 287
Posts: 1020
Light side points please
|
|
« Reply #14 on: June 04, 2013, 03:32:51 AM » |
|
I have no electronics experience either but I put the saber together using a) information I found on this forum, b) information I found on "the other guys" forum and c) just examining the sabers I have and copying what I saw. A stunt saber is not really that complicated, just an LED, and battery, a switch, and a resistor (maybe). TCSS has a "resistor chart" on their site that has good information about what resistor to use with which LED. Or you can always ask the forum, someone will help. If you have the extra cash, a BUCK PUCK can be used in place of the resistor. That is a variable resistor that will work with any LED regardless of color. It is a true no brainer. I just used one for another built that was made with too many parts for the other guys to put on this forum (out of resect for Ultra Sabers) but the BUCK PUCK is worth every penny.
My hilt does rattle beacuse there is not much in there, just the battery pack, LED and switch. Sound and other stuff will take up more space, I had no problem putting everything in this one and have extra space.
As far as equipment, This was an excuse for me to buy a drill press but you do not need one unless you want to do stuff like put on a D-ring or covertec wheel. Everything else just screws together (there are only really three pieces to the body). You will need a soldering iron and some extra wire. Use 24 or 26 gauge which you can find at hobby shops that sell RC car stuff or trains. Radio Shack may not have it. You will also need shrink wrap to cover the joints. Get a spool of wire and practice before you solder your good parts. It is not that hard and there are videos on youtube about it.
Building a saber is fun and rewardng. Give it a try, you will not be sorry. Start small and work your way up. And good luck.
|
|
|
|
|
Logged
|
|
|
|
|
|


